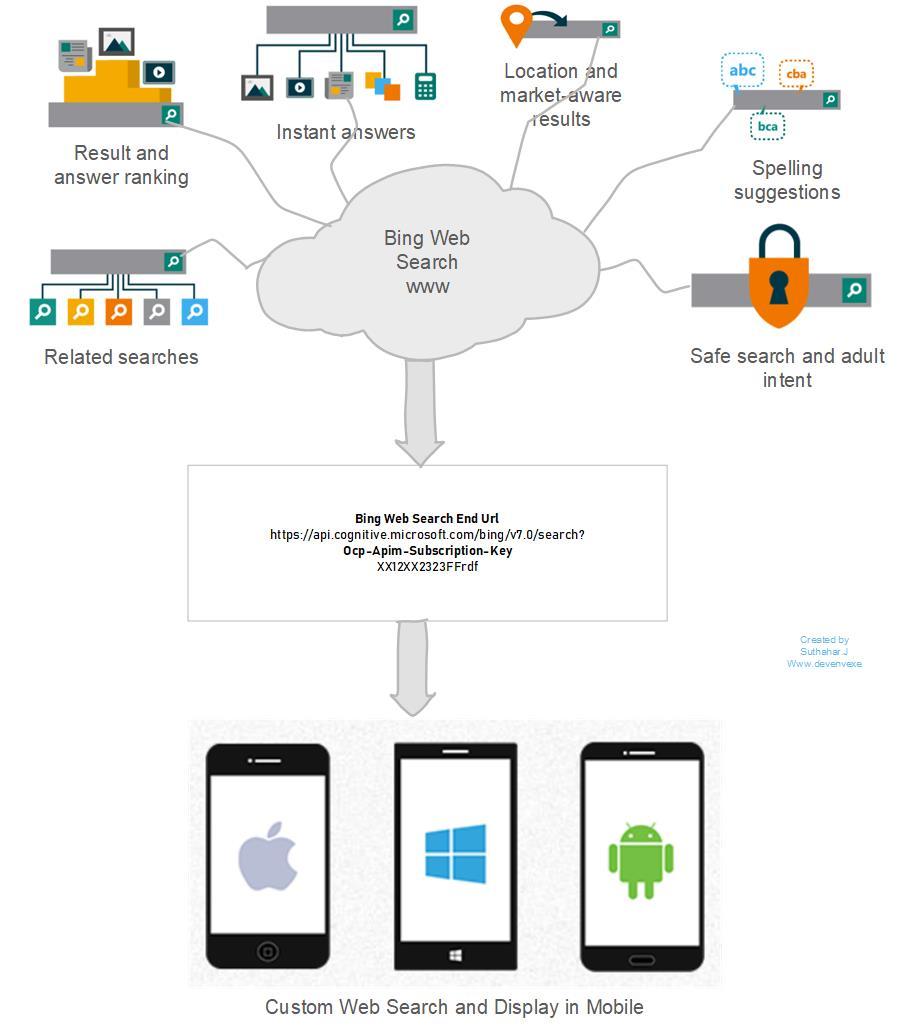
The Bing News Search API returns a list of world news from a search query which can be Customize
trending news from around the world by category and region. Results include information such as news title, description, URL, provider and images. This API provides a list of categorize news searches by topics such as World, Politics, Sports, and more. The News Search API uses
JSON format for data exchange, and API Keys for authentication.

In this article, I will show how to generate Bing Search subscription key and integrate into the Xamarin application
Register Bing Search in Azure Portal:
You need to create an Azure account and generate
subscription key for implementation to the Xamarin Mobile application.
Step 1:
Create On “+ Create a resource “> Under Azure Marketplace, select AI + Cognitive
Services and discover the list of available APIs. > Select “ Bing Search v7 APIs”
Step 3:
on the create page, Provide the name, pricing, resource group a click on Create

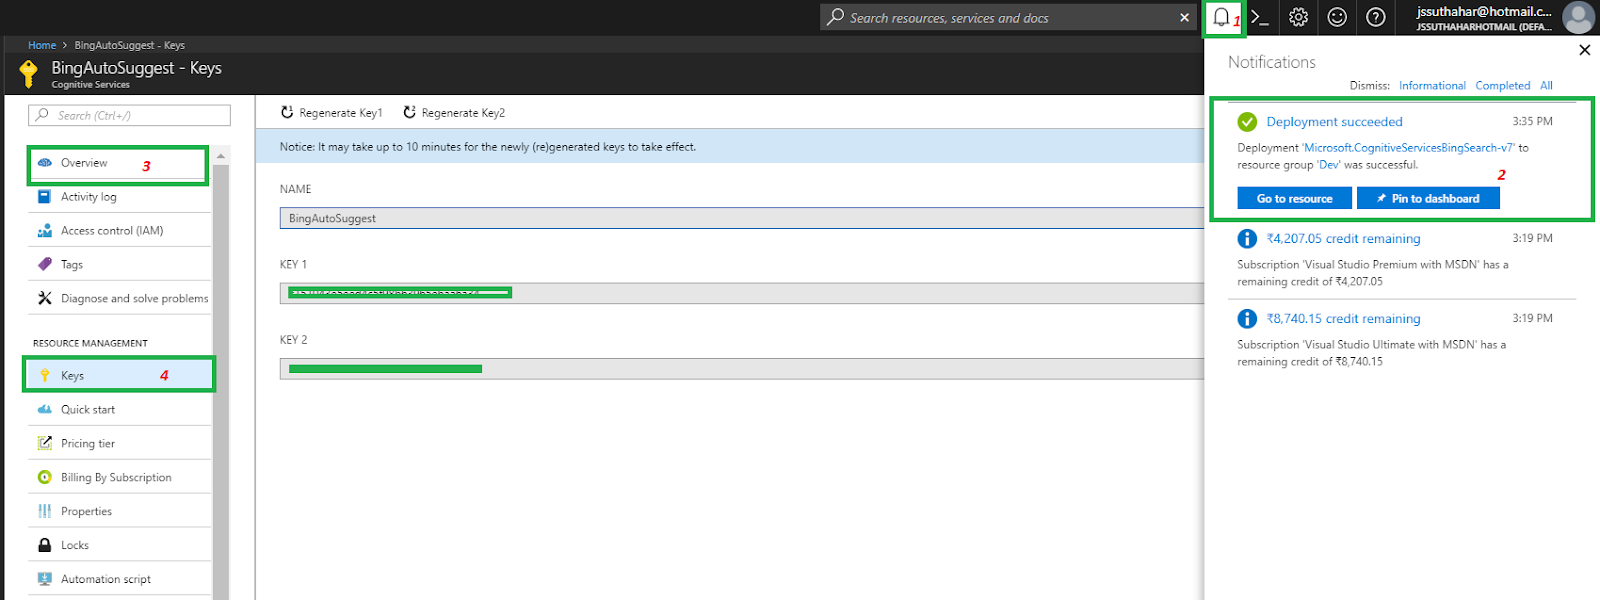
Step 4:
wait for few seconds, After the Cognitive Services account is successfully deployed,
click the notification or tile in the dashboard to view the account information.
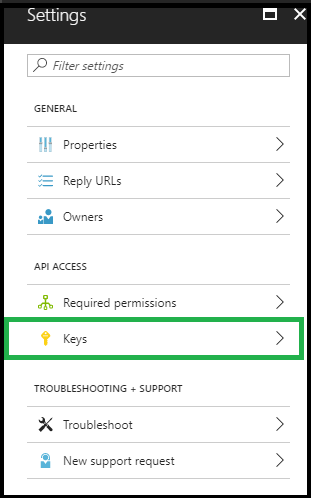
You can copy the Endpoint URL in the Overview section and keys in the Keys section
to start making API calls in our Xamarin applications.

Create Bing New Search Xamarin Application:
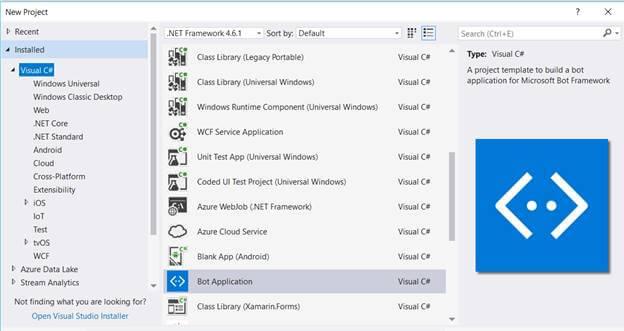
Let's start with creating a new Xamarin Forms Project using Visual Studio. Open Run >>
Type “Devenev.Exe” and enter >> New Project (Ctrl+Shift+N) >> select Blank Xaml App
(Xamarin.Forms) template.
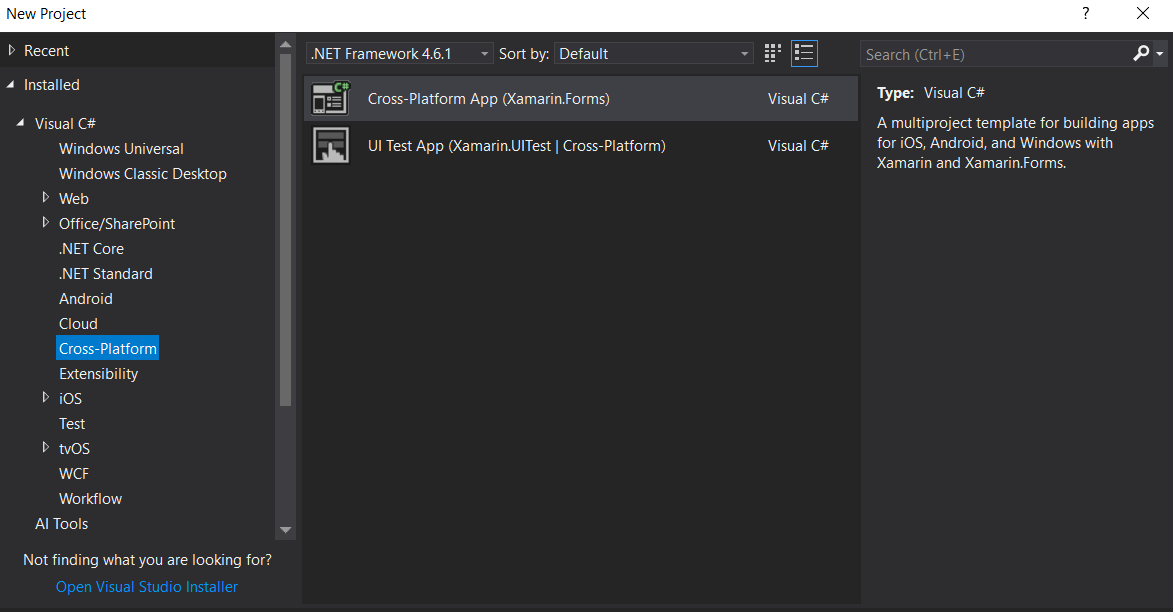
It will automatically create multiple projects, like .NET Standard, Android, iOS, and UWP.
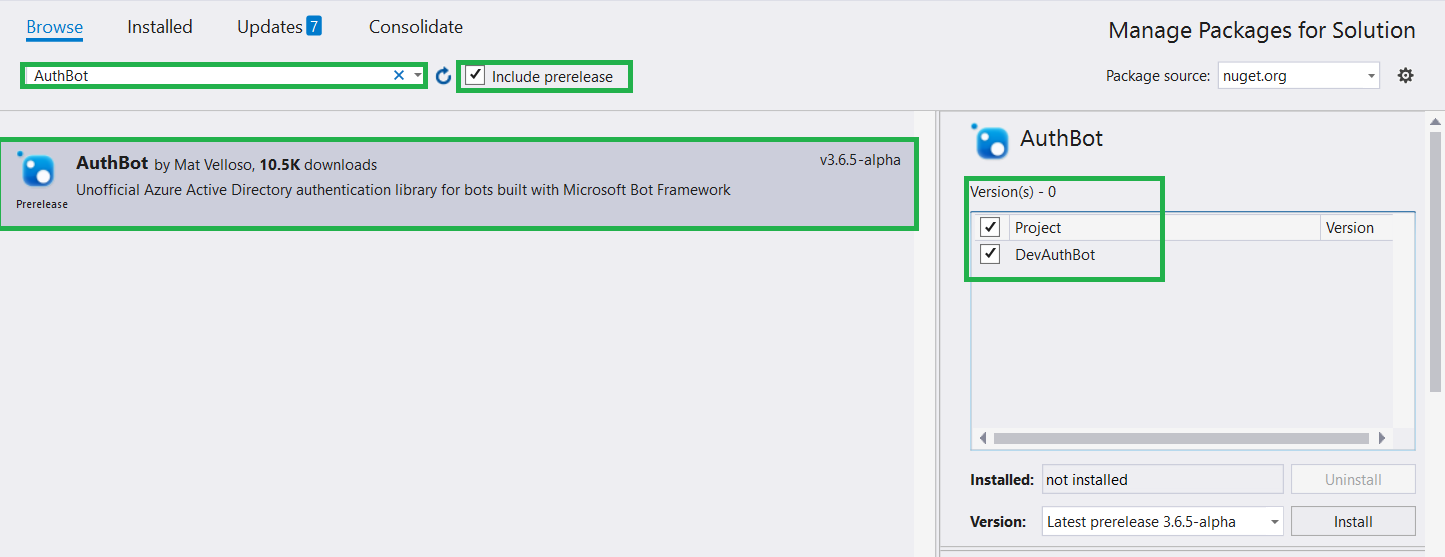
Install Newtonsoft.Json :
Bing News Search API will return Json object value so make sure you have added the
Newtonsoft JSON NuGet Package to your all project. Right Click on Solution >
Manage Nuget Package > Install Newtonsoft Json

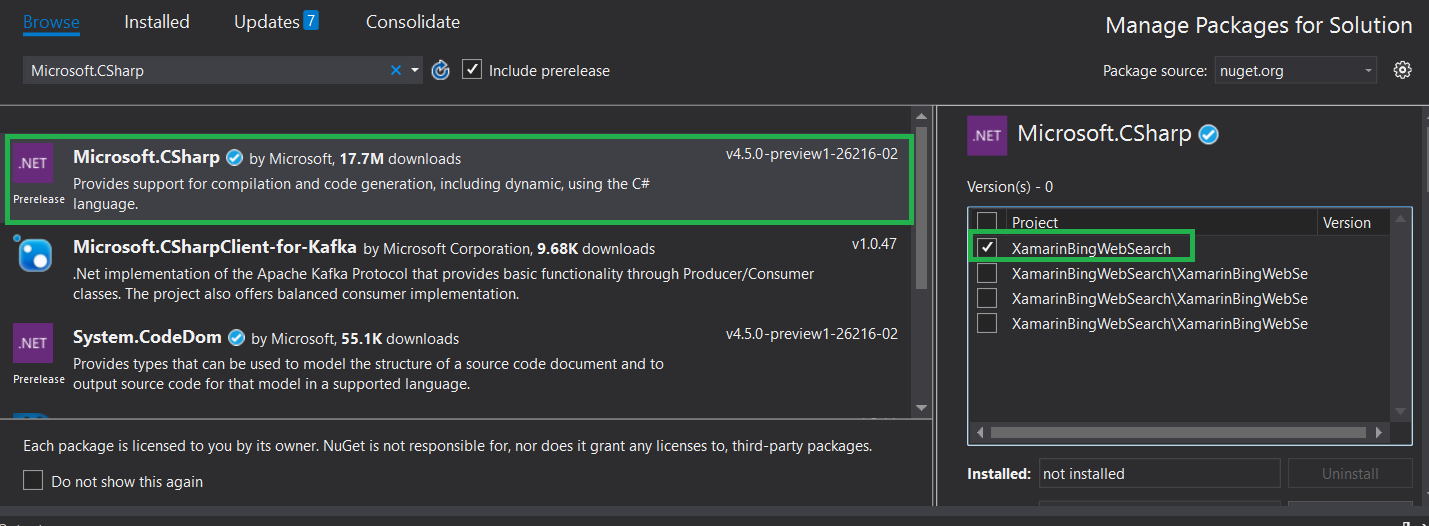
Install Microsoft.Csharp :
This steps is optional, if you get Error "Microsoft.CSharp.RuntimeBinder.Binder.Convert"
not found by the compiler for dynamic type so adding a reference as Microsoft.CSharp to the
Dotnet Standard /PCL project , issue will get resolve .

Design View:
After successfully install above two
nuget package. Let start
design UI design from Dot Standard /PCL project. In PCL Project > Open MainPage.Xaml page and add design Entry and list view control with Itea template in Xaml
<
?xml version="1.0" encoding="utf-8"
?>
<
ContentPage xmlns="http://xamarin.com/schemas/2014/forms"
xmlns:x="http://schemas.microsoft.com/winfx/2009/xaml"
xmlns:local="clr-namespace:XamarinBingNewsSearch"
:Class="XamarinBingNewsSearch.MainPage">
<ContentPage.Content>
<
StackLayout>
<Label Text="Search News" ></Label>
<Entry x:Name="entrysearch" Placeholder="Type Your text" TextChanged="OnTextChangesEvent" />
<ListView x:Name="lstnews" BackgroundColor="Azure">
<ListView.ItemTemplate>
<DataTemplate>
<ViewCell>
<StackLayout Orientation="Horizontal" >
<StackLayout Orientation="Vertical">
<Label Text="{Binding Title}" Font="18"></Label>
<Label Text="{Binding Description}" TextColor="Gray"></Label>
<Label Text="{Binding Provider}" TextColor="Gray"></Label>
</
StackLayout>
<Image Source="{Binding ThumbnailUrl}" HeightRequest="30" WidthRequest="50"
HorizontalOptions="EndAndExpand"></Image>
</
StackLayout>
</ViewCell>
</DataTemplate>
</ListView.ItemTemplate>
</ListView>
</
StackLayout>
</ContentPage.Content>
</
ContentPage>
Bing news search will return title and description, URL and images so create model class for news article
namespace XamarinBingNewsSearch.Model
{
public class NewsArticle
{
public string Title { get; set; }
public string Description { get; set; }
public string Url { get; set; }
public string ThumbnailUrl { get; set; }
public string Provider { get; set; }
}
}
Configure the project:
We need to get News only search results so send a GET request to the following endpoint and
replace subscription key from Mainpage.xaml.cs
private string NewsSearchEndPoint = "https://api.cognitive.microsoft.com/bing/v7.0/news/search";
public HttpClient BingNewsSearchClient
{
get;
set;
}
public MainPage
()
{
InitializeComponent
();
BingNewsSearchClient = new HttpClient();
BingNewsSearchClient.DefaultRequestHeaders.Add("Ocp-Apim-Subscription-Key", "YOUR API KEY");
}
Get and Parse Json Data:
HttpClient class provides a base class
for get/Post the HTTP requests/responses from a URL.
It is a supported
async feature of
.NET framework.
HttpClient is able to process multiple concurrent requests.
The following code showing get all Json data using Bing suggestions API url and Parse the json
and binding into the list view for autocomplete
private async void OnTextChangesEvent
(object sender, TextChangedEventArgs e)
{
try
{
if(entrysearch!=null)
lstautosug.ItemsSource = await GetAutoSuggestResults
(this
.entrysearch.Text);
}
catch (HttpRequestException)
{
}
}
public async Task<List<string>> GetAutoSuggestResults
(string query)
{
List<string> suggestions = new List<string>();
string market = "en-US";
var result = await AutoSuggestionClient.GetAsync(string.Format("{0}/?q={1}&mkt={2}",
AutoSuggestionEndPoint, WebUtility.UrlEncode(query), market));
result.EnsureSuccessStatusCode
();
var json = await
result.Content
.ReadAsStringAsync
();
dynamic data =
JObject.Parse
(json);
if (data.suggestionGroups != null && data.suggestionGroups.Count > 0 && data.suggestionGroups[0].
searchSuggestions != null)
{
for (
int i = 0;
i < data
.suggestionGroups[0]
.searchSuggestions.Count; i++)
{
suggestions.Add
(data
.suggestionGroups[0]
.searchSuggestions[i]
.displayText.Value);
}
}
return suggestions;
}
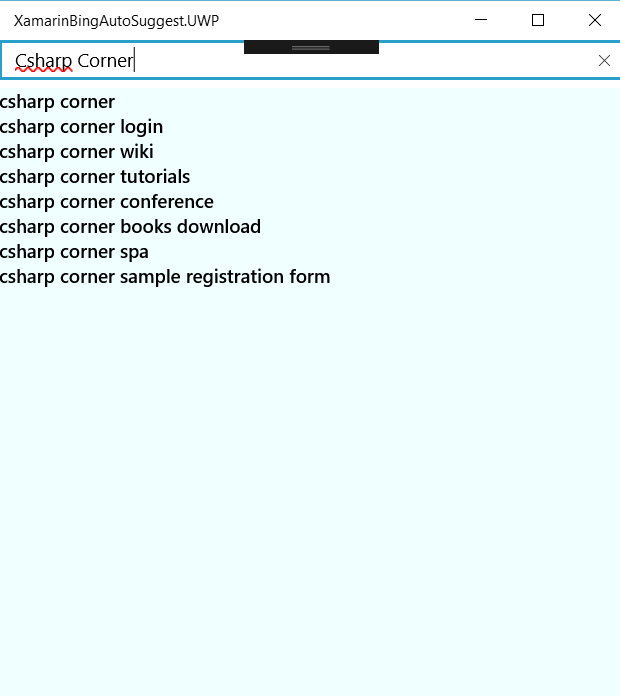
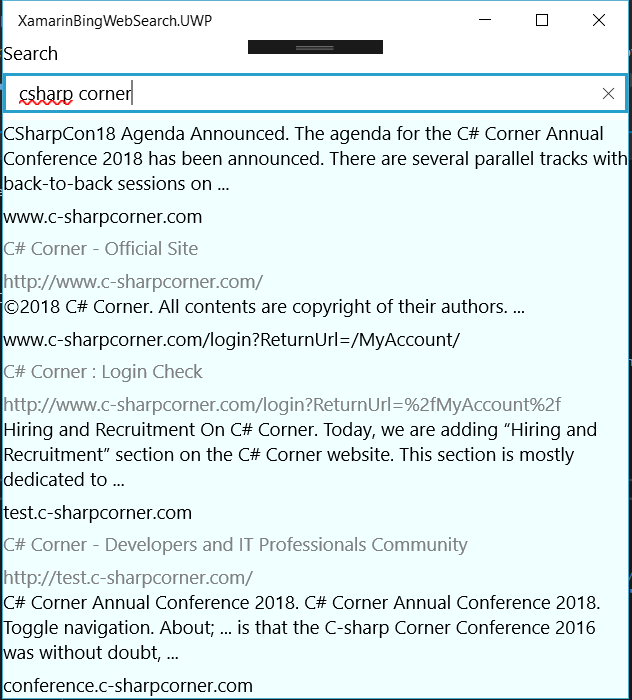
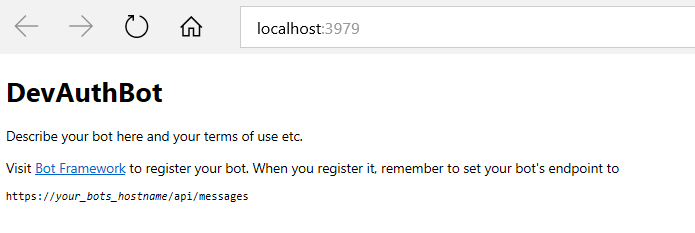
Run the Application:
We have completed the coding now start
run the application so you can select the platform iOS
,Android
, Windows and Click on Run (f5) the application
.

Summary
In this article, you learned about how to generate Bing Autosuggest subscription key and integrate
into the Xamarin application
.If you have any questions/ feedback/ issues, please write in the comment box.


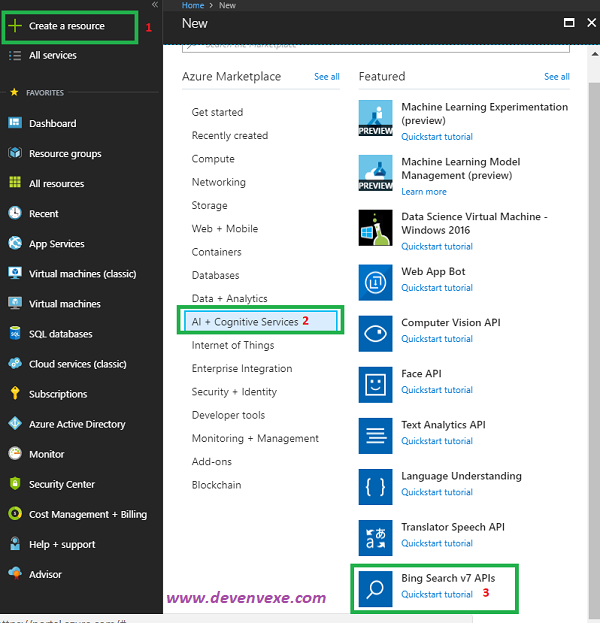 Step 2:

