Getting Started Chatbot using Azure Bot Service
Introduction:
The Azure Bot Service is powered by the Microsoft Bot Framework and bot service allows developers to build conversational applications that plug into many popular chat applications including Facebook Messenger, Skype and Office 365, etc. In this article, we can be creating and testing a bot by using the Azure Bot Service.
Create new Bot Service:
Logon to the Azure portal with your registered Azure Microsoft account. If you don’t have azure subscription, you can Create a free trial Azure subscription from Azure portal.
In Azure Portal > click on + Add > Select on Data Analytics

Step 1:
Select on new Bot service from data analytics menu

Step 2:
You can provide following information for create new bot service unique App name to your bot’s name. The name is used as the subdomain in azure website (eg DevEnvExeBot.azurewebsites.net).
Select the Azure subscription.
Select the Azure subscription.
Select the resource group or create new user group.
Select the location. And click on Create button

Select the location. And click on Create button
Step 3:
After clicking on Create button, wait a few minutes for the Bot Service to be deployed successfully before proceeding. You will get confirmation notification for after success.
Register Bot Application:
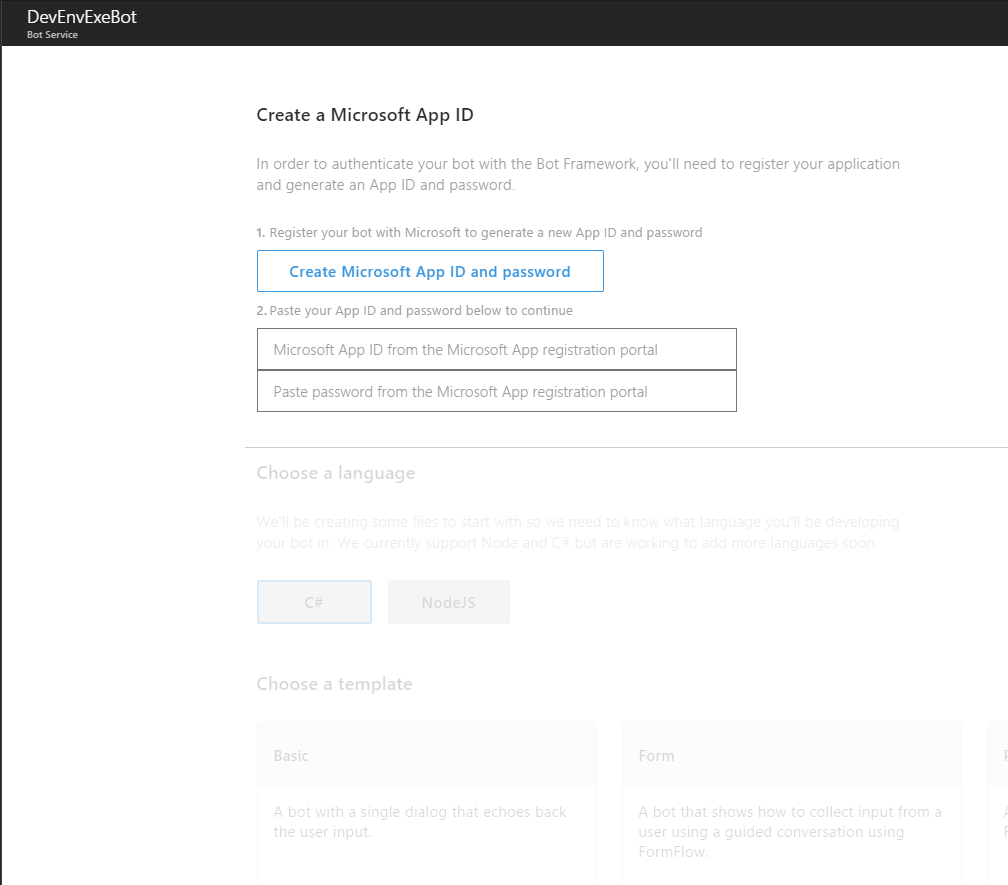
You can click on confirmation notification. then, you will get the following screen where you need to create App ID. This is a prerequisite to authenticating your bot with the bot framework.Step 1:
Click on Create Microsoft App ID and Password

Step 2:
App ID and password will generate following screen and click on button for go back to Bot framework
Step 3:
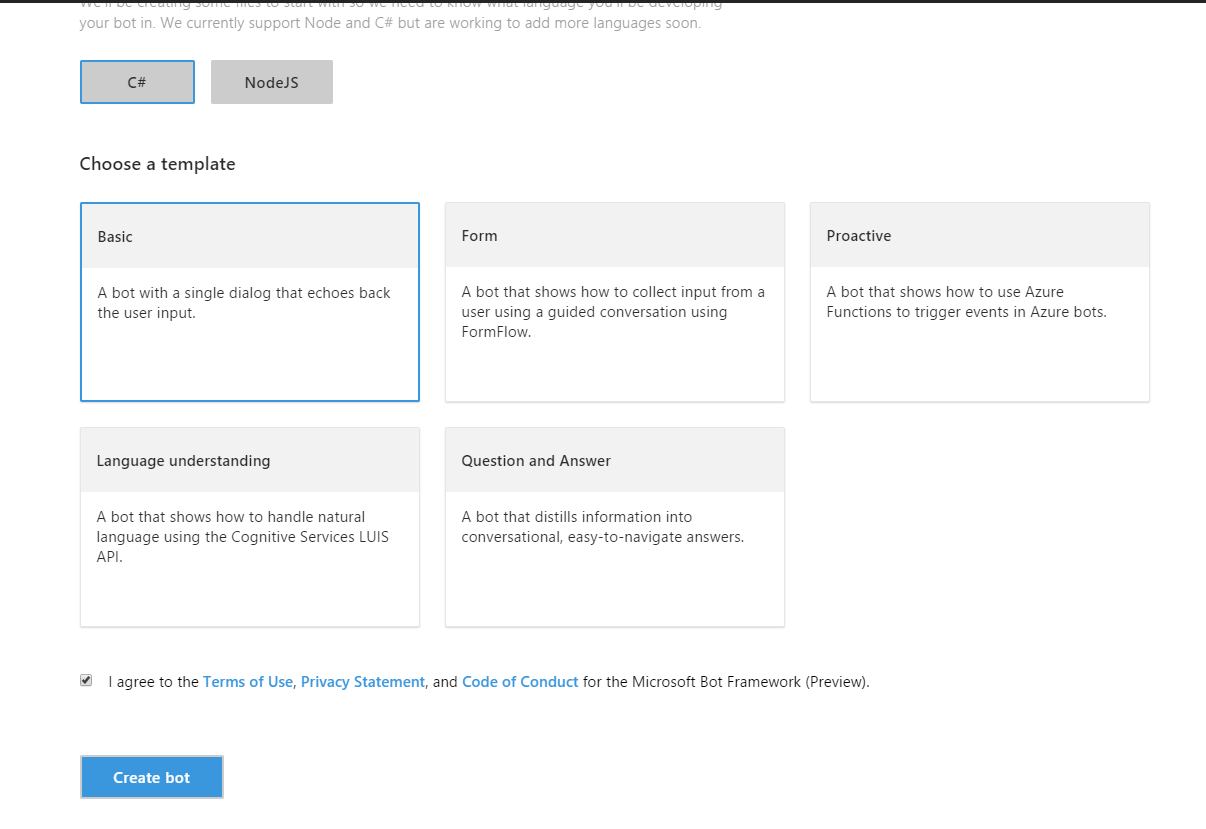
Select the Programming language and template for developing bot application
 Step 4:
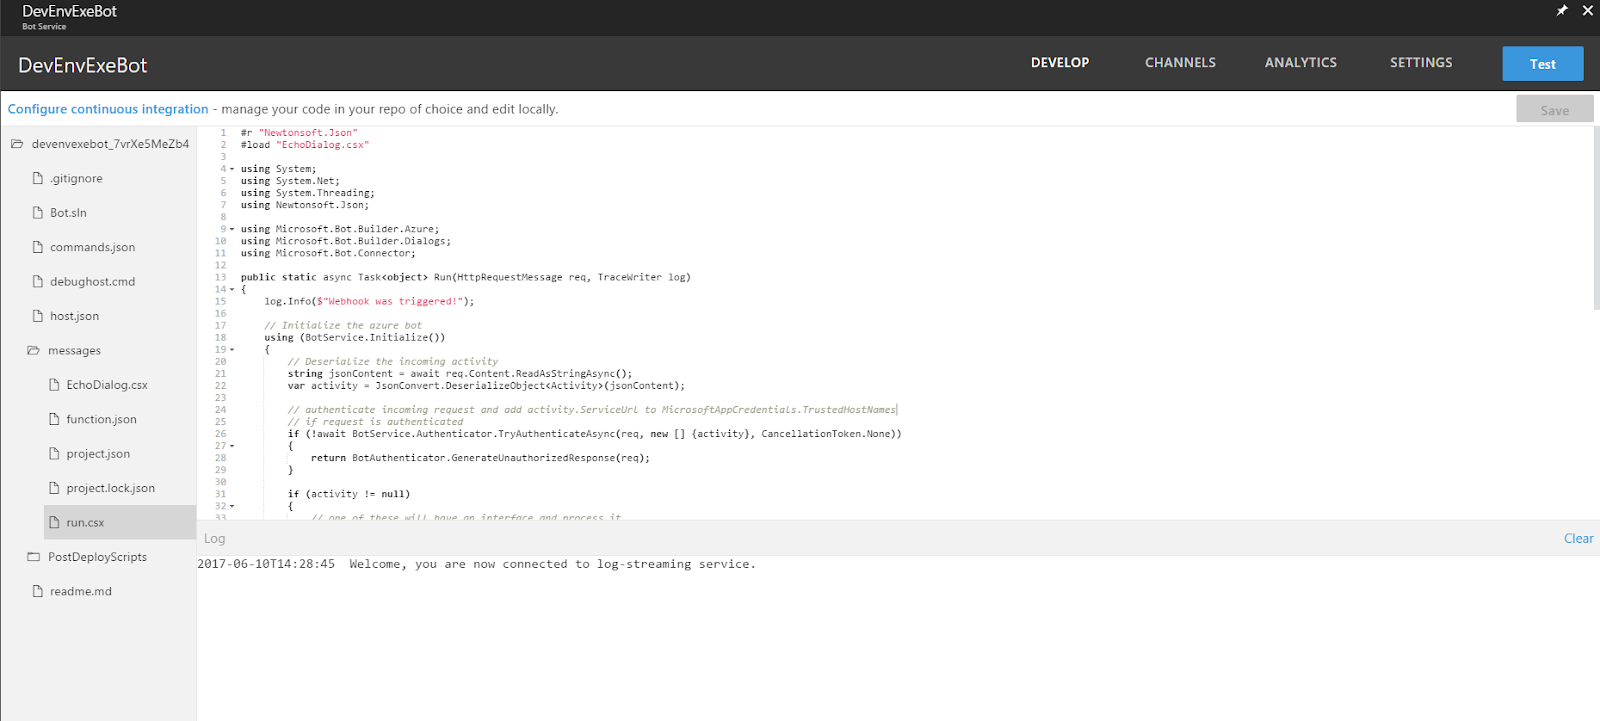
Now bot application successfully created and running in the cloud, you can edit code from Azure Develop code editor and also you can manage channels, analytics and setting.


0 Comments