Create Azure Active Directory Login
Microsoft Azure Active Directory (Azure AD) to add authentication and authorization to Our web, mobile Application and web APIs. In this article I
 Azure Active Directory Application creation:
I will show below steps for application creation, user creation and permission configuration. While Step 1: App Registration:
Login to Microsoft Azure Portal https://portal.azure.com and choose Azure Active Directory from the sidebar.
The under Manage Select on App Registration => Click on + Add button
Provide the following details, name for the Application, select the Application Type as Native( Mobile application) or Web app/API, and for Sign-on URL enter your application URL and Click on Create

from mobile or web so follow below steps for grand permission. Select on newly created application => Select on Required Permission => Click on Grand permission.

Step 3: Create
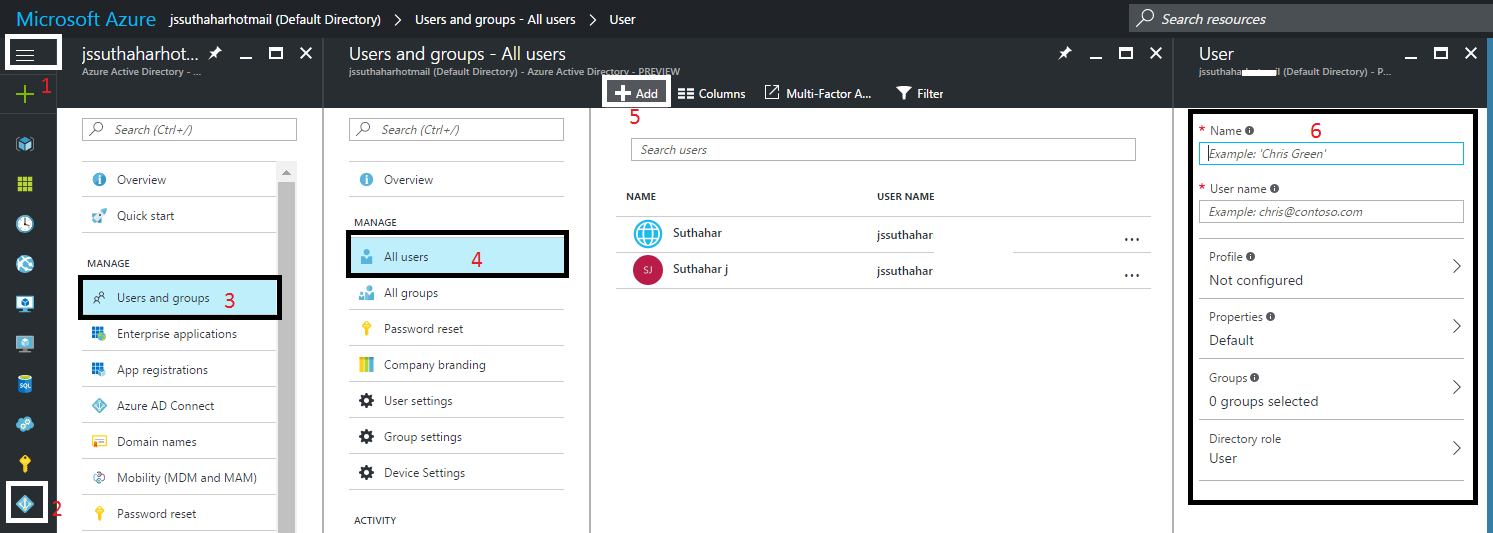
Create user for access the application. choose Azure Active Directory from the sidebar => Select Users and groups =>Select All Users=> Click on +Add =>provide the user details as below Name of user , user name (email id).

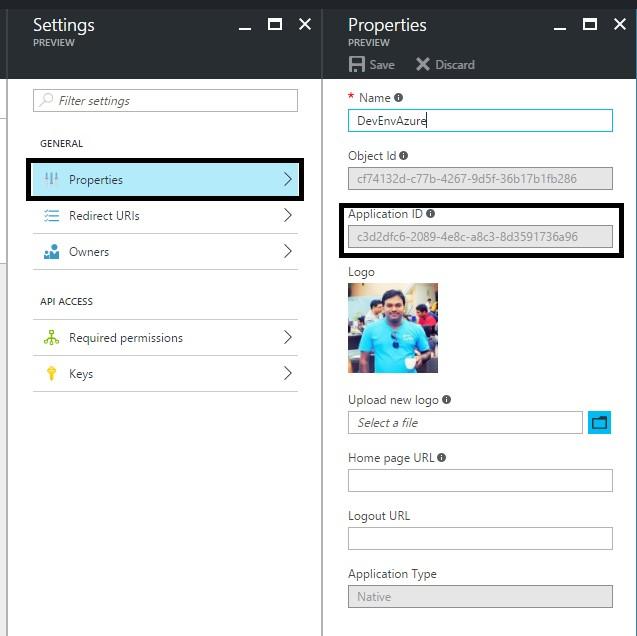
unique identifier for our application. We need client id for implement Azure AD authentication in mobile application so you can follow below steps for get client id. choose Azure Active Directory from the sidebar =>Select App registrations =>Select newly created application => Click on property = > Use Application Id as client ID
Click on Redirect Url under settings =>get redirect url / update redirect url

choose Azure Active Directory from the sidebar => Select on Properties => use Directory ID as tenant ID

You can implement Active directory login in Web ,Mobile ,Windows application using Client ID ,Redirect Url and Tenant ID ..
Provide the following details, name for the Application, select the Application Type as Native
Step 2: App Required Permissions:
We need to give permission to access application
Step 3: Create new user :
Create user for access the application. Step 4: Get Client ID and Redirect Url:
The Client Id isClick on Redirect Url under settings =>get redirect url / update redirect url
Step 5: Get Tenant:
We already register our application in a Azure AD tenant. We need tenant ID for implement AD authentication in mobile application. you can follow below steps get tenant id.choose Azure Active Directory from the sidebar => Select on Properties => use Directory ID as tenant ID
You can implement Active directory login in Web ,Mobile ,Windows application using Client ID ,Redirect Url and Tenant ID ..


0 Comments